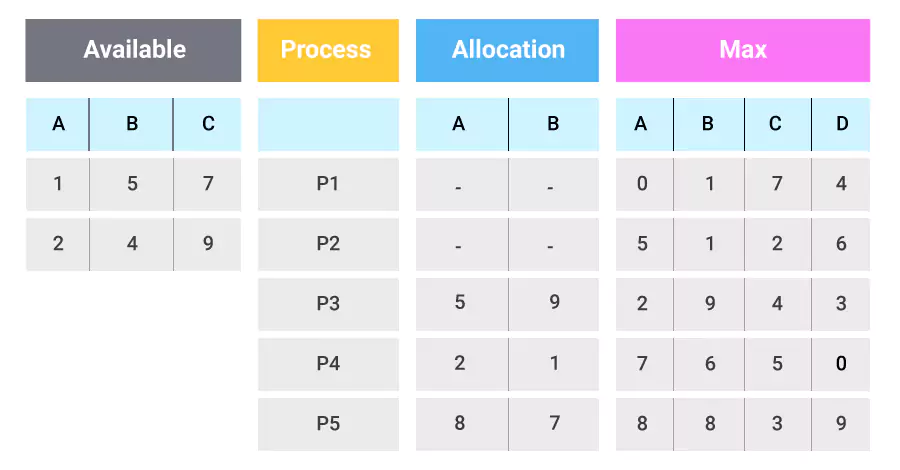
The use of tables is crucial for efficiently organizing and presenting data. However, ensuring these tables are accessible to all individuals, including those with disabilities, is equally important. This step-by-step guide will explore how to make a table accessible in PDF format.
By following these guidelines, you can ensure that your tables are visually stunning, inclusive, and accessible to everyone. So let's dive in and discover the key techniques to create accessible PDF tables that will enhance the user experience for all individuals.
Simple tables have a basic structure and do not contain any complex features, such as merged cells or nested tables. Take the below reference for your consideration.
These tables are easier to make accessible as they require less coding and formatting.
Complex tables typically contain more detailed or nuanced information than simple tables. They often include multiple rows and columns and may have merged cells or nested tables. Take the below reference for your consideration.

When structuring tables for accessibility, it is important to consider the logical flow of information and provide clear headings for each column and row. It allows screen reader users to navigate through the table more easily.
Tables should be designed to be responsive and resizable so that low-vision users can enlarge them without losing any information. Read further to know how you can do it perfectly.
Explain the importance of using table headers to provide context and improve readability for assistive technologies. Table headers are essential for providing context and improving readability for assistive technologies.
They allow screen reader users to interpret the content of each column and row by clearly describing the data within. Without table headers, it can be difficult for users with visual impairments to navigate and comprehend the information presented in a table.
Describe the process of adding row and column headers to ensure a logical flow of information within the table. Adding row and column headers involves labeling each row and column with descriptive text accurately representing the data.
It assists users in smoothly identifying and understanding the content within each cell, facilitating a seamless navigation experience. By providing clear and concise headers, users can efficiently interpret the information presented in the table, enhancing their overall comprehension and usability of the content.
Provide guidelines on merging and splitting cells in a table to maintain clarity and avoid user confusion. Merging cells in a table can be useful when combining related information or creating a more visually appealing layout. However, ensuring that the merged cells maintain clarity and avoid overlapping data is important.
Splitting cells, on the other hand, can be helpful when there is a need to separate previously merged information or to accommodate additional data in a specific cell. By following proper guidelines for merging and splitting cells, users can effectively navigate and understand the content presented in the table.
For digital accessibility, PDF remediation is essential for all users, including those with visual impairments or screen readers, to access and understand the information presented. Let us now explore various techniques that can be used to create PDF files using different software.
Right-click the table and select "Table Properties."
In the "Alt Text" tab, describe the table's purpose and content concisely.
Avoid excessive cell merging, as it can complicate table navigation.
If merging is necessary, use proper header labels to maintain clarity.
Ensure sufficient contrast between text and background.
Use simple and legible fonts to enhance readability.
Open the "Accessibility" tool, choose "Add Tags to Document," and select the table.
Ensure the correct table structure is reflected in the tags.
Right-click the table, choose "Edit Table," and add alternative text in the "Tag Properties."
In the "Tag Properties," mark the first row as header cells.
Adjust header tags for rows and columns as needed.
Check the reading order in the "Tags" panel to ensure it follows the logical sequence.
In the "Tag Properties," add a summary that describes the table's purpose.
Select the first row and click "Table" "Header row" to designate it as a header.
Use bold text or shading to differentiate header cells.
Right-click the table, choose "Table properties," and add a description under "Alt Text."
Insert a caption above the table, summarizing its content.
Include context and purpose in the caption.
Keep tables simple without complex nesting or formatting.
Avoid using tables for layout purposes.
Adding alternative text descriptions is necessary for each software to create an accessible table in PDFs. You can use our alt text writing services to ensure your table is accessible to users with visual impairments.
Using tagged tables ensures that the data is presented clearly and concisely. A tagged table makes it simple for users to understand the material in extremely long tables with repeated information. Also, it makes it accessible for consumers using accessible applications. Follow these steps:
Step 1: Open the PDF document file that you want to tag. At the top right navigation panel, select Tools. A dropdown list should appear below the right navigation panel.
Step 2: From the dropdown, select accessibility, and another dropdown list should open up.
Step 3: Select TouchUp Reading Order. A Touch Up Reading Order window will open up.
Step 4: Highlight the table you want to tag.
Step 5: Select the Table button from the TouchUp Reading Order window after highlighting the table.
Step 6: A gray box will fill the table with a number in a white box and a text labeled "Table".
Step 7: Select the white box with a number and select the Table Editor button from the TouchUp Reading Order window. The gray box that fills the table should turn red. It means that you are in Table Editing mode. A dark-colored red cell means that it is a table header. A light-colored red cell means it is a table of data.
Step 8: Check if the table is correctly tagged. If the header and data cells are correctly tagged, skip the rest of the steps.
Step 9: Highlight a cell by selecting a cell with your left mouse button or highlight multiple cells by holding your left mouse button and dragging your cursor to the other cells you want to highlight.
Step 10: After selecting a cell, press your right mouse button and select Table Cell Properties. A new window will pop up.
Step 11: Select if the cell is a header or a data. If it is a header cell, select the Header Cell option. If it is a data cell, select the Data Cell option. Select OK.
Note: Repeat Step 9 through Step 11 to change another cell to a header or data. Congratulations, you are done tagging your table!
In this comprehensive guide, we have explored how to make a table accessible in pdf using various techniques and processes. Following these steps ensures your table is accessible to all users, including those with visual impairments or disabilities.
Remember to test your PDF document with assistive technologies to ensure accessibility remediation. Making your table accessible improves the user experience and demonstrates inclusivity and compliance with accessibility standards.
Share